Handmade is simply better than store bought. Try your hand at one of these simple do-it-yourself winter crafts. They're easier than you think!
Paper Snowflakes
You don't need a coat and gloves to enjoy these snowflakes. And, just like the ones that fall outdoors, your creativity can ensure no two of these simple, elegant crafts from Martha Stewart will look alike!
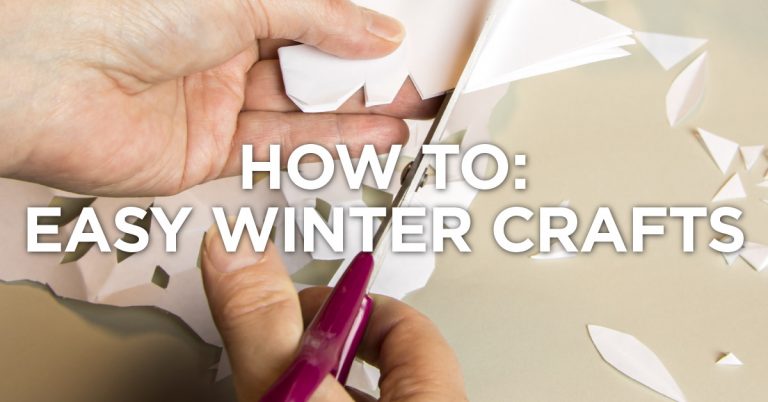
All you need are a few squares of white paper, scissors, and clear tape or poster putty. Start by folding the square in half diagonally to make a triangle. Next, fold that triangle in half to make another triangle, and fold that triangle in half one more time to make an even smaller triangle. Next, carefully fold one point so that it overlaps the other point and makes the shape of a narrow arrowhead (see image). Trim the bottom corners off with your scissors. Now, it's time to let your imagination do the work. Cut the paper, alternating between straight and curvy lines, and long and short cuts. Have fun experimenting here – there's really no right or wrong way to do it. Just watch your fingers.
Once you're finished with your snowflakes, show them off! Stick them to windows, string them together and place on the mantel, or attach them to greeting cards and gifts. Anywhere you can use a bit of winter inspiration.
Recycled Crayons
Is your family's winter missing some color? This kid-friendly craft from the clever gals at SheKnows.com is for you! Gather all the broken crayons and leftover nubs from around the house. You'll also want to pick up a few of those cheap flexible ice cube shape molds at the dollar store, a hobby knife or sharp scissors, and a cookie tray.
Preheat your oven to 200 degrees. Meanwhile, use the knife or scissors to carefully remove all the paper wrapping from your crayons – let parents or older children tackle this step. Next, break up the crayons into small half-inch bits, as these will melt faster. Fill the molds with different colors. Try some molds with similar color hues, and let your creativity flow into others! You'll want to overfill each mold just a little bit, since the colored wax will take up less space as it melts.
Put the molds onto a cookie sheet and into the oven for about 10 minutes or until the wax is completely melted. Then very carefully, remove the cookie sheet and allow to cool. Be careful not to spill any of the hot wax! To speed up the cooling and hardening process, place the molds in the fridge or freezer.
After about 30 minutes or when the crayons are hard and cool to the touch, they're ready. Now it's time to get your doodle on!
A Cozy, Snowy Wreath
Wreaths don't have to be complicated to look nice and celebrate the season. In fact, this DIY winter wreath from blogger Lucy at Craftberry Bush is surprisingly simple to make, since it reuses a spare wreath if you already have one at home.
Dust off that old wreath and wrap it with a few cheap white felt scarves from the dollar store. If you already have a white scarf or two at home you're not using, you can reuse these, too. Next, you'll want to use another scarf that complements the white wraps, but features a contrasting pattern. Browse your local thrift shop or the back of your coat closet for something knitted. Once your scarves are wrapped, lightly decorate them with light foliage, snowflake decor, and top it all off with a little bird like Lucy did in the link above. She used pins instead of hot glue to attach the pieces, which allows you to reuse everything for new crafts once the winter season ends. Clever. Simple. Perfect.
We hope you enjoyed reading these brief DIY tutorials. Perhaps you tried one or two of them, added your own unique twists, or found inspiration to try something completely different. Crafting is a great way to help pass the time during these cold winter months, and keeps your spirits high and your mind sharp while you're battling cabin fever. Now, check out these other inside activities and games that the entire family will enjoy!